
How to Photograph Small Spaces
Not every listing is a sprawling six-bedroom estate. Condos, townhomes, starter homes, and older houses with smaller original footprints make up a huge share of the market. They deserve photography that makes them feel open and livable rather than cramped. Here's how professional real estate photographers approach small spaces to maximize how they feel.
Lens Choice Matters More Than People Think
The single biggest factor in how spacious a room looks in a photo is lens selection. A standard smartphone or entry-level camera lens tends to compress a room, making walls feel close together and ceilings feel low. Professional real estate photographers typically shoot with wide-angle lenses (often in the 16-24mm range on a full-frame camera): specifically because they capture more of a room in a single frame without the extreme distortion of an ultra-wide "fisheye" lens. The goal is to show the space within a limited view while limiting distortion.
The key is balance. Too wide, and objects start to bow and rooms look stretched in a way that feels unnatural or even misleading. Too narrow, and a small room simply doesn't fit in the frame at all. Skilled real estate photographers calibrate lens choice and camera position specifically for each room's dimensions rather than using one setting for the entire home.
Decluttering and Staging Small Rooms
In a large room, a few extra items barely register in a photo. In a small room, every object takes up a proportionally larger share of the visual space, which makes decluttering one of the highest-leverage steps before any small-space shoot. Clearing counters, minimizing furniture to just what's essential, and removing anything that isn't part of the intended room function (exercise equipment in a bedroom, storage boxes in a closet) all make a meaningful difference in how spacious the final photos feel.
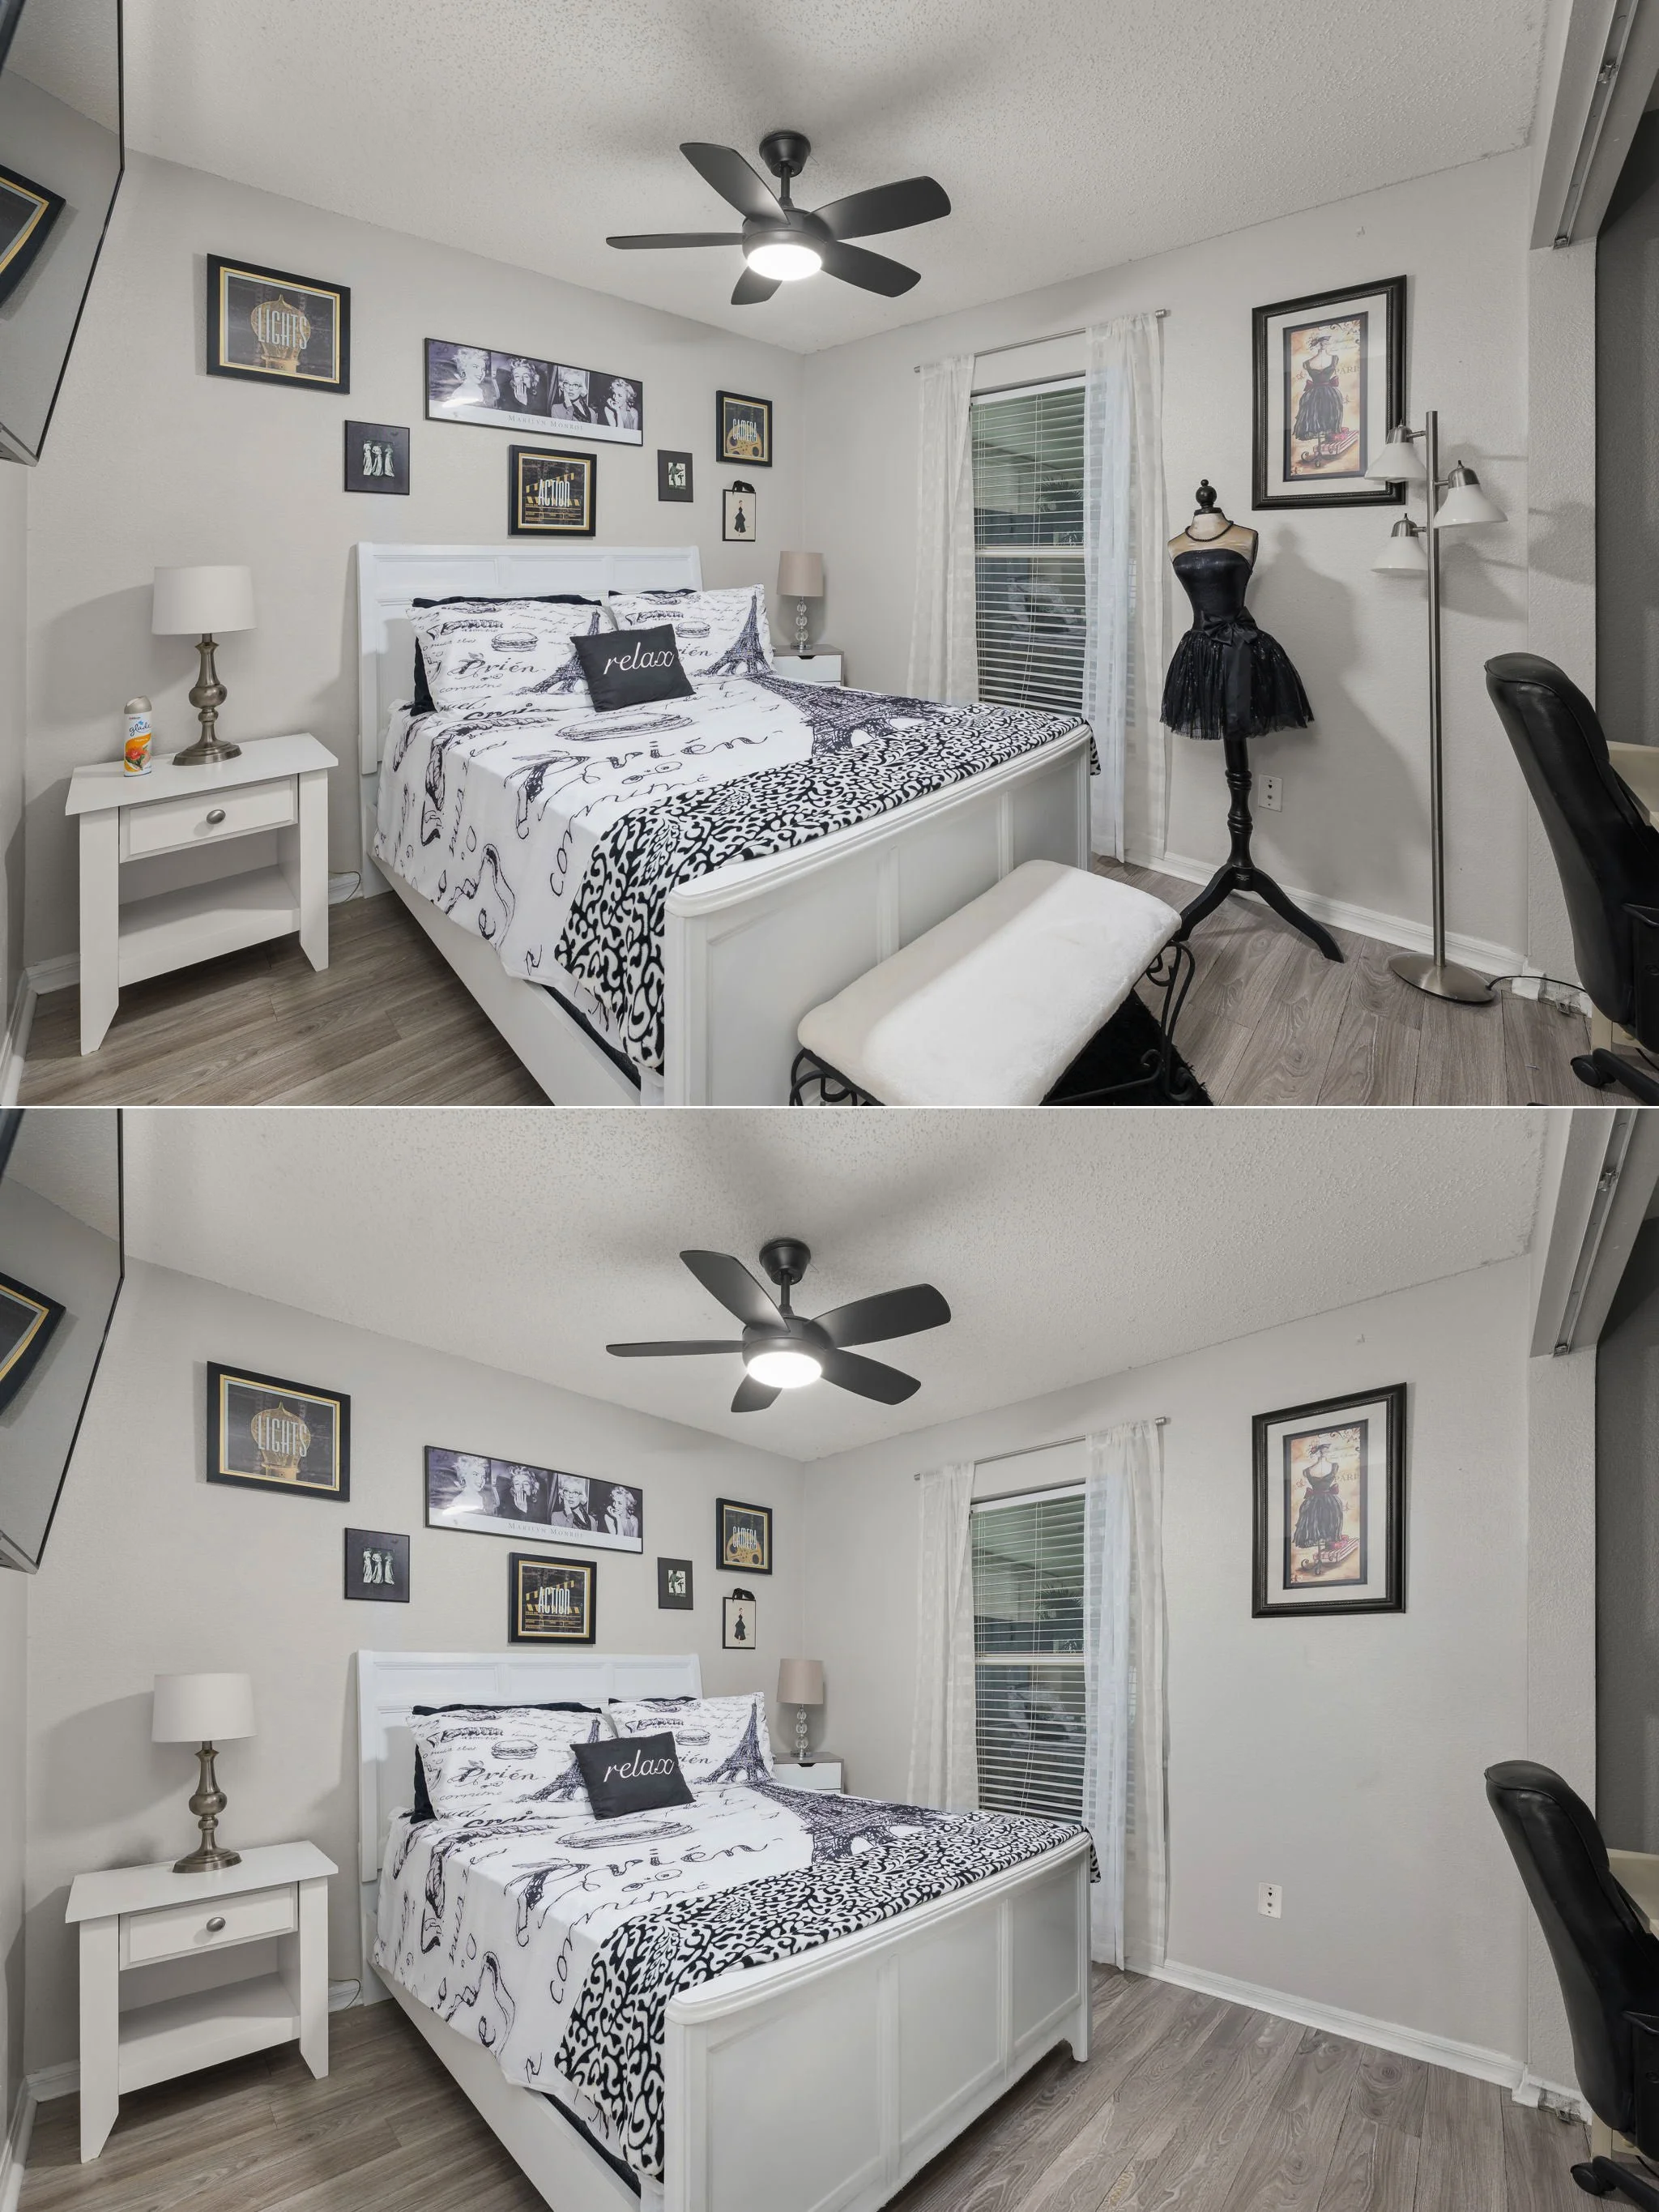
Just removing a few items really opens up this tiny bedroom.
Furniture placement matters too. Pulling furniture slightly away from walls, or removing an oversized piece entirely, can open up sightlines across a room in a way that makes it read as larger, even though the physical square footage hasn't changed at all.
Camera Height and Angle Change Everything
Where a photographer positions the camera has a huge impact on perceived space. Shooting from eye level results in too much ceiling and an unnatural composition when shooting wide angle. Shooting too low can result in even more ceiling. There a delicate balance depending on the space. Kitchens, for example, should be some of the taller shots to avoid shooting the underneath of cabinets and to provide a viewer a more natural pov since kitchens are designed to be stood in. Seating areas can be shot a bit lower since their designed to be sat in. Unless that living room has really high ceilings, a bit more height can help the room feel larger.
Positioning the camera in or near a corner captures more of the room's width and depth in a single frame than shooting straight into a wall, which is one of the simplest ways to make a small bedroom or living area feel more expansive without any editing tricks at all.
Getting a little creative can help too, especially with small half-baths. Taking a shot just outside this bathroom doesn’t feel cramped. Whereas the shot inside the bathroom, the near wall feels really close for comfort.
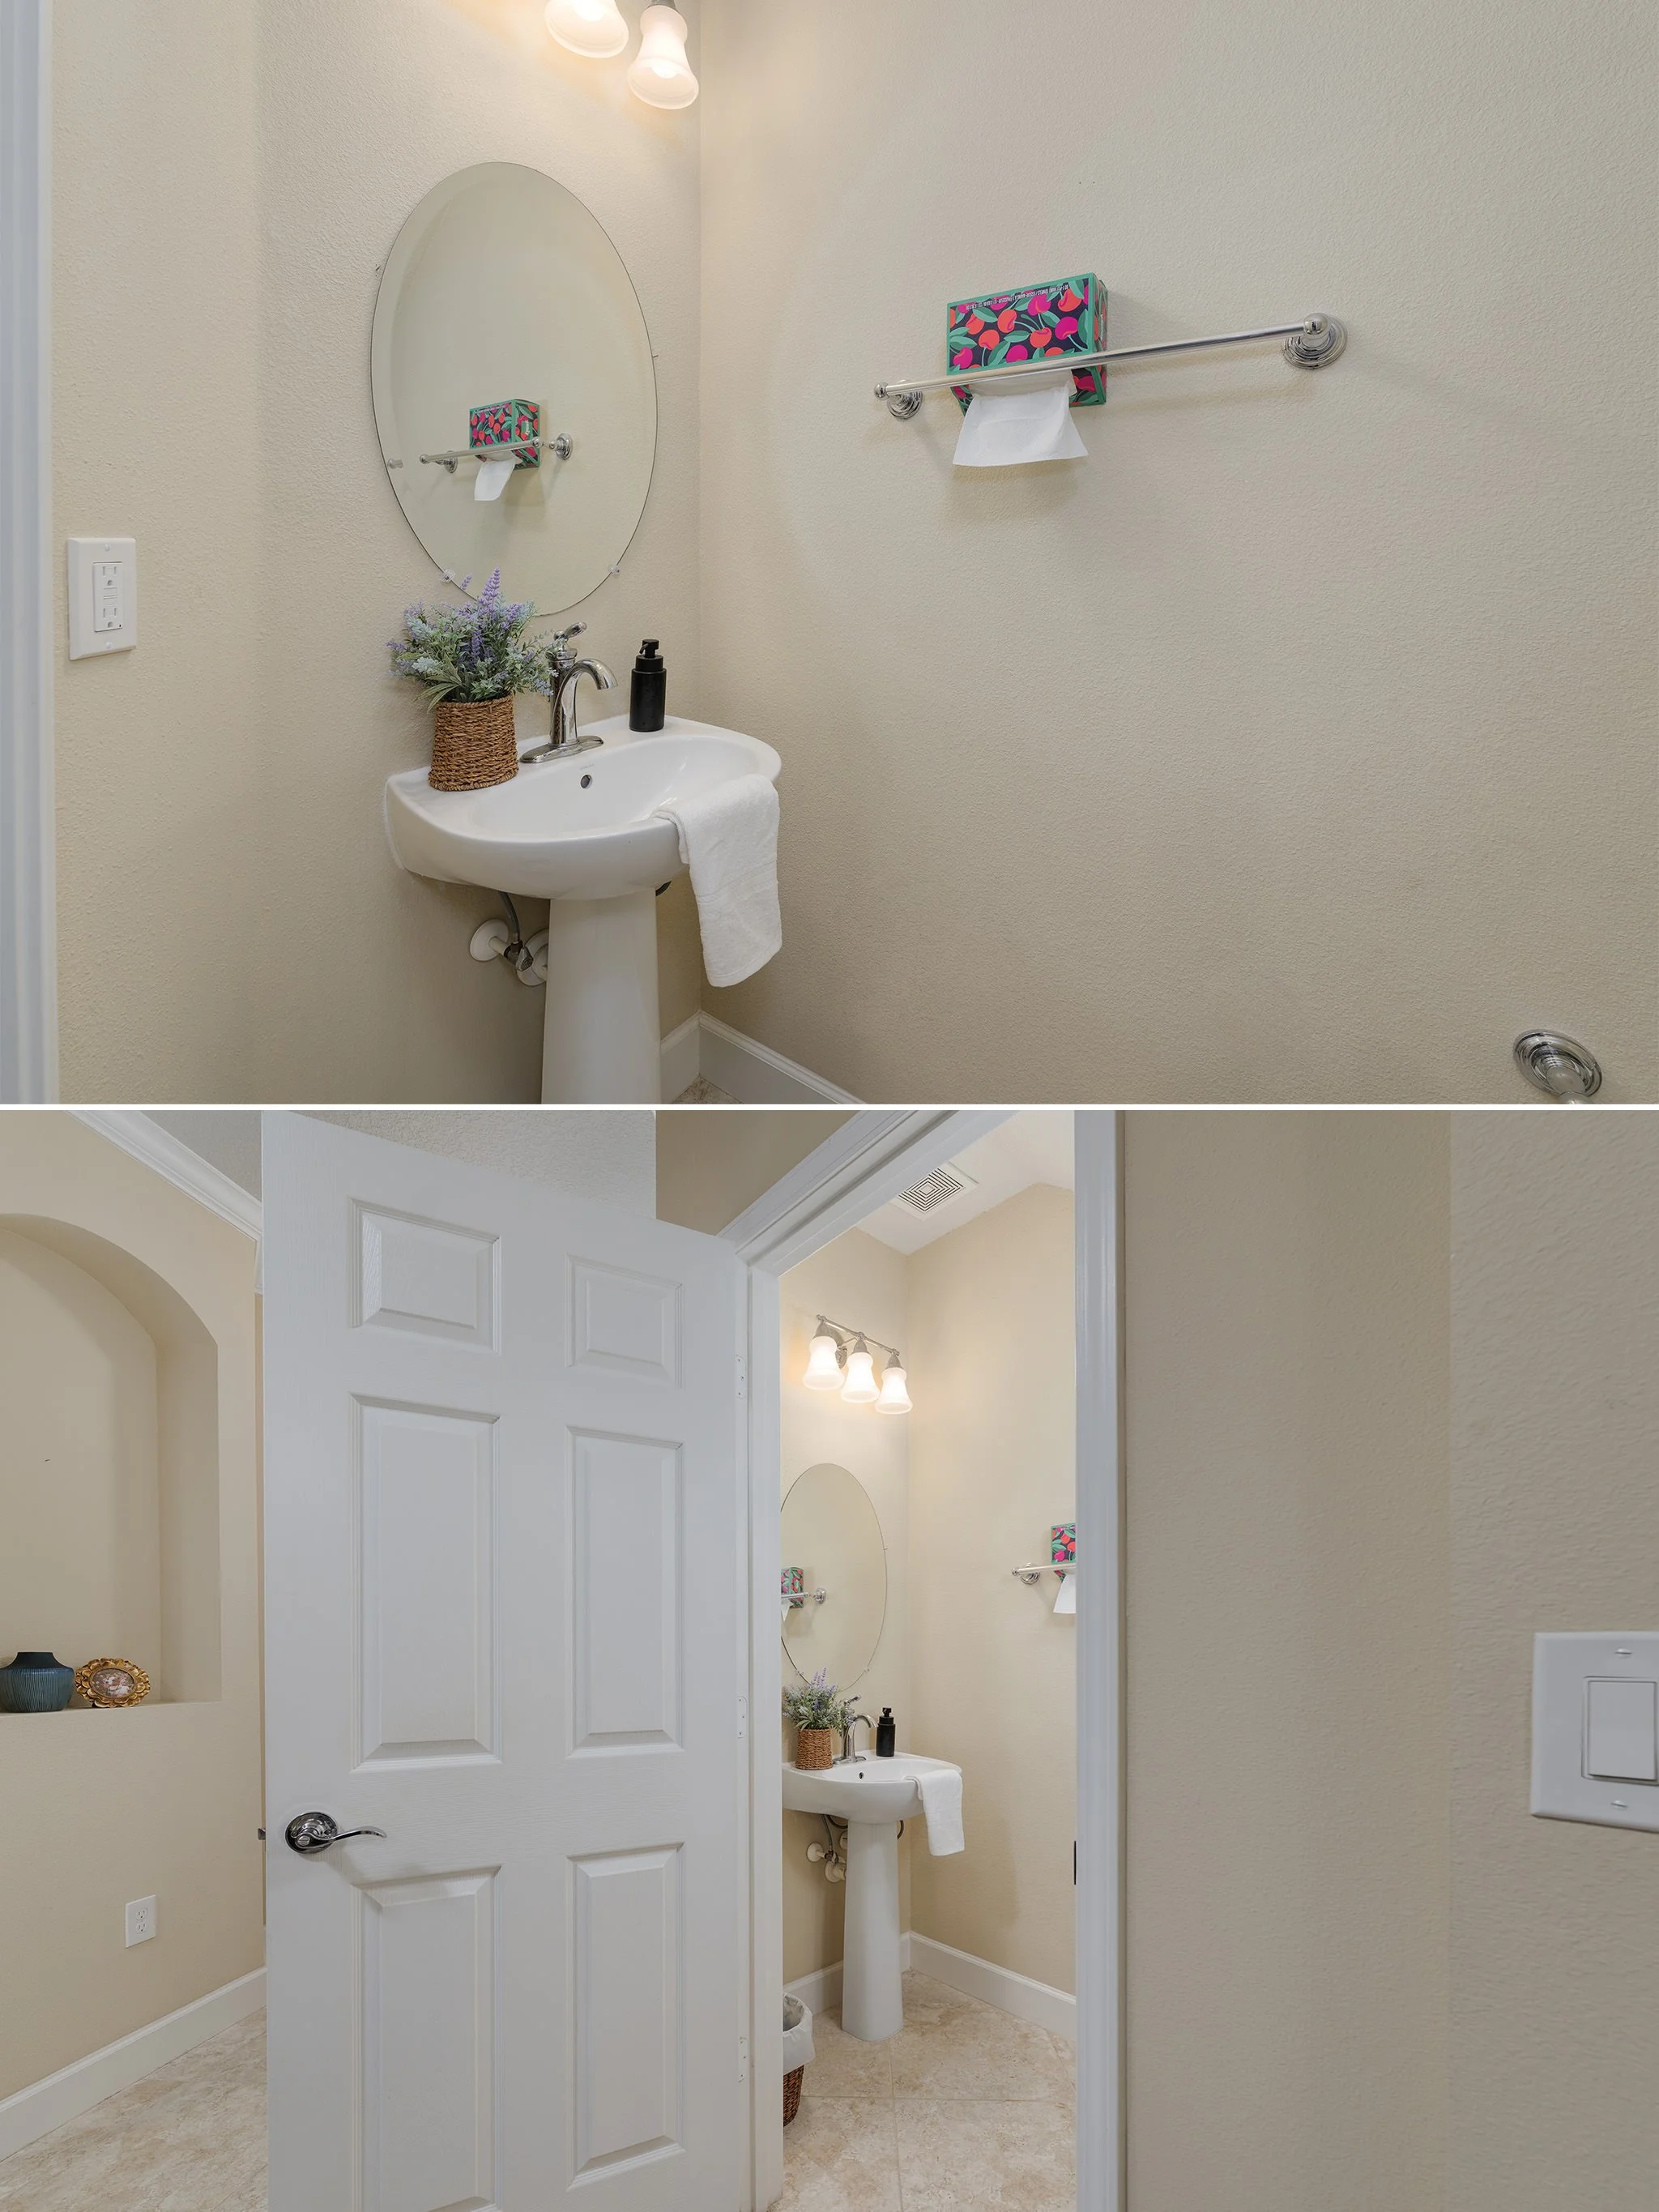
Shooting from outside a small bathroom can go a long way.
Lighting Is the Difference Between Cramped and Cozy
Small rooms are especially sensitive to lighting, because shadows and dark corners make a space feel smaller and more closed-in than it actually is. Professional photographers typically combine natural light from windows with supplemental lighting (off-camera flash) to fill in shadows and even out exposure across the room, rather than relying on a single light source that leaves half the space dim.
Bright, even lighting does more to make a small room feel open than almost any other single technique. A well-lit 10x10 bedroom photographed correctly can look noticeably larger than the same room shot with flat, uneven light and dark corners.
Remember, our eyes see more than what a camera and display can present. So even though a space may receive supplemental lighting, it doesn’t mean that in person our eyes don’t automatically adjust to the space in real time.
What Agents Can Do Before the Shoot
A few simple steps before the photographer arrives make a measurable difference in small-space photos:
Remove excess furniture rather than trying to fit everything into the frame
Turn on every light in the room, including lamps, well before the shoot starts
Open blinds and curtains fully to maximize natural light
Clear countertops and surfaces of anything not essential to the room's function
The Bottom Line
Small spaces don't have to photograph small. With the right lens, camera position, lighting, and a bit of pre-shoot staging, even compact rooms can look bright, open, and inviting: which matters enormously for condos, townhomes, and starter homes where buyers are already sensitive to square footage. The goal isn't to trick buyers into thinking a room is bigger than it is; it's to present the space at its honest best.
Have a listing with tight spaces or an older floor plan? We specialize in making every square foot count: reach out and we'll walk you through our approach before the shoot.